Affichage des articles dont le libellé est Upcycling. Afficher tous les articles

DIY tutorial: Pallet Couch / Fait maison tutoriel: canapé en palettes

We wanted to make a couch out of wooden pallets for a long time, so we sold our futon, and we went behind a mall to get some free pallets. Here they are:
Ça faisait un moment que l'on voulait faire un canapé en palettes. Nous avons donc vendu notre futon, et nous sommes allés récupérer des palettes gratuites derrière un centre commercial. Les voici:

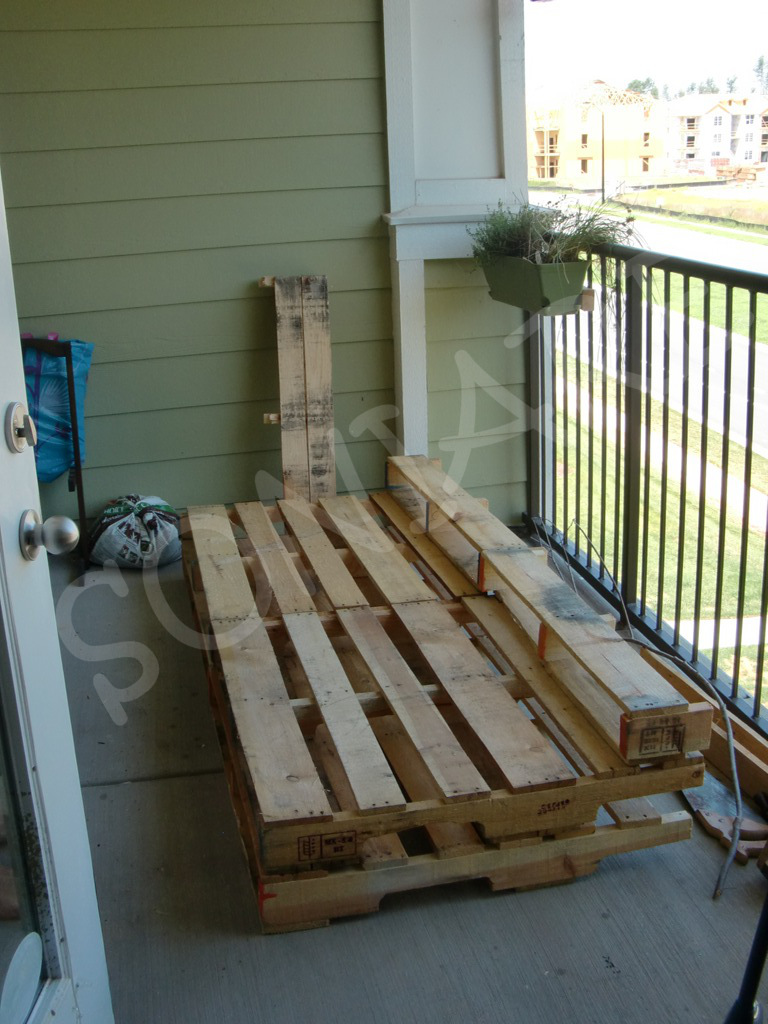
Since we are planning to move in less than 2 months, we didn't even sand them. We just cut them to the size we needed. Here you can see what we cut.
Vu que nous envisageons de déménager dans moins de 2 mois, nous n'avons même pas poncé les palettes. Nous les avons juste découpées à la taille souhaitée.

Then we kept the remaining part to do the backrest.
Nous avons ensuite garde les morceaux coupes pour faire le dossier.


We just used 4 screws for each backrest (8 screws total).
Nous avons uniquement utilise 4 vis par dossier (8 vis au total).

Now let's take care of the pillows. We found these three pillows in the trash, so we cleaned them, and we decided to make a main slipcover for the three of them. Here are the pillows:
Maintenant nous allons nous occuper de la garniture. Nous avons trouve trois coussins a la poubelle que nous avons nettoyés, puis nous avons décidé de fabriquer un housse pour les mettre dedans. Voici donc les coussins:

For the bottom of the slipcover, we decided to use canvas. It's cheap and resistant.
Pour les dessous de la housse, nous avons utilise du canevas. C'est pas cher et c'est résistant.

For the top, we used some Ikea fabric that we had left.
Pour le dessus, nous avons utilise des restes de tissus Ikea que nous avions.

Here you can have a closer look at the confection.
Voici une vue détaillée de la fabrication.

Here is the cover once done. We also painted the pallets for a nicer look.
Voici la housse terminée. Nous avons aussi peint les palettes pour une meilleure finition.

Now the backrest. We used some mattress top that we rolled together:
Maintenant le dossier. Nous avons utilisé des mousses enroulées entre elles:

And finally we made a cover for the backrest with some other Ikea fabric. TADAAA!
Et enfin, nous avons fait une housse pour le dossier avec d'autres restes de tissus Ikea. Et Voila!!!


Better than new !
Mieux que du neuf !

Soniare and Takskal

DIY tutorial: Drawer cabinet colorful painting / Fait maison tutoriel: repeindre une commode à tiroirs

Here is a used, old drawer cabinet.

And its drawers (don't forget to put a number on each drawer before you remove them...)

First we need to sand everything. The cabinet:

And the drawers (we don't have a power sander, so we used elbow grease instead...):

Now we can start to paint!
For the cabinet, we used spray paint (3 layers).

For the drawers, we used a paint roller (2 layers for each color).
Here is the yellow layer:

Once the paint was dry, we used some narrow tape to draw some curved patterns:

We painted the next layer with some blue (you can still see the tape)

This time, don't wait for the paint to dry, remove the tape as soon as possible. Otherwise the blue layer will crack. Also if you didn't sand the yellow layer properly, the yellow layer may crack as well. If like us you don't like to wait, you can use a hair dryer to make things go faster!

Here is the final result:

Better than new !

Soniare and Takskal

DIY tutorial: Ottoman refashion / Fait maison tutoriel: remodeler un vieux pouf

We bought an old ottoman a while ago, it was old and dirty, so we decided to refashion it, here it is :


We started by dissasembling everything


We used the old fabric as a pattern for the new cover !


We covered the ottoman with the new fabric and re-assambled the ottoman, here is the new one :


And inside:


Better than new !

Soniare and Takskal

DIY tutorial: refreshing some old garden armchairs / Fait maison tutoriel: transformer de vieilles chaises de jardin

Here are two old armchairs. We paid $5 for the pair at a yard sale last summer (2011)

First we removed the old fabric (and we kept it as a model)

Here we are using the old fabric to cut the new one that we choosed.


Here are all the fabric elements of the chairs.

 We then painted the chairs with some spray paint (after sanding the old paint).

 Time to reassemble everything.

 Here is the first chair completely done.

 As you can see we painted some caps in orange to hide the screws.

 Here are both armchairs.