Affichage des articles dont le libellé est Furniture. Afficher tous les articles

DIY tutorial: Pallet Couch / Fait maison tutoriel: canapé en palettes

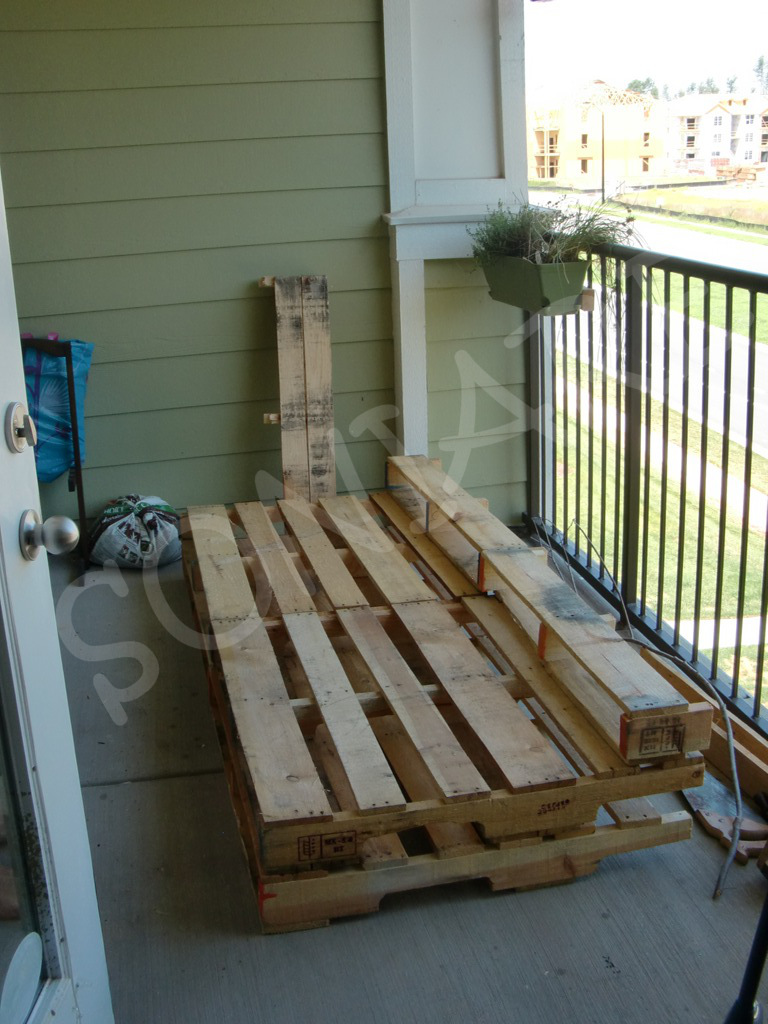
We wanted to make a couch out of wooden pallets for a long time, so we sold our futon, and we went behind a mall to get some free pallets. Here they are:
Ça faisait un moment que l'on voulait faire un canapé en palettes. Nous avons donc vendu notre futon, et nous sommes allés récupérer des palettes gratuites derrière un centre commercial. Les voici:

Since we are planning to move in less than 2 months, we didn't even sand them. We just cut them to the size we needed. Here you can see what we cut.
Vu que nous envisageons de déménager dans moins de 2 mois, nous n'avons même pas poncé les palettes. Nous les avons juste découpées à la taille souhaitée.

Then we kept the remaining part to do the backrest.
Nous avons ensuite garde les morceaux coupes pour faire le dossier.


We just used 4 screws for each backrest (8 screws total).
Nous avons uniquement utilise 4 vis par dossier (8 vis au total).

Now let's take care of the pillows. We found these three pillows in the trash, so we cleaned them, and we decided to make a main slipcover for the three of them. Here are the pillows:
Maintenant nous allons nous occuper de la garniture. Nous avons trouve trois coussins a la poubelle que nous avons nettoyés, puis nous avons décidé de fabriquer un housse pour les mettre dedans. Voici donc les coussins:

For the bottom of the slipcover, we decided to use canvas. It's cheap and resistant.
Pour les dessous de la housse, nous avons utilise du canevas. C'est pas cher et c'est résistant.

For the top, we used some Ikea fabric that we had left.
Pour le dessus, nous avons utilise des restes de tissus Ikea que nous avions.

Here you can have a closer look at the confection.
Voici une vue détaillée de la fabrication.

Here is the cover once done. We also painted the pallets for a nicer look.
Voici la housse terminée. Nous avons aussi peint les palettes pour une meilleure finition.

Now the backrest. We used some mattress top that we rolled together:
Maintenant le dossier. Nous avons utilisé des mousses enroulées entre elles:

And finally we made a cover for the backrest with some other Ikea fabric. TADAAA!
Et enfin, nous avons fait une housse pour le dossier avec d'autres restes de tissus Ikea. Et Voila!!!


Better than new !
Mieux que du neuf !

Soniare and Takskal

DIY tutorial: Refresh / remake a mattress box spring / Fait maison tutoriel: refaire un sommier

Here is the box spring, it was in a really bad condition!
Voici le sommier, comme vous pouvez le voir, il était en très mauvais état!

The first step is to remove everything. In our case the fabric was too bad to be saved, so we kept only the wood frame.
Le première étape consiste à enlever tous le tissus. Malheureusement il était tellement abîmé que nous n'avons pu sauver que le cadre en bois.

Now we have to rebuild it layer by layer. First the cardboard layer. We recycled the cardboard from our coach:
Maintenant, il faut tout refaire couche par couche. Commençons par la couche de carton. Nous avons recyclé le carton d'origine de notre canapé:

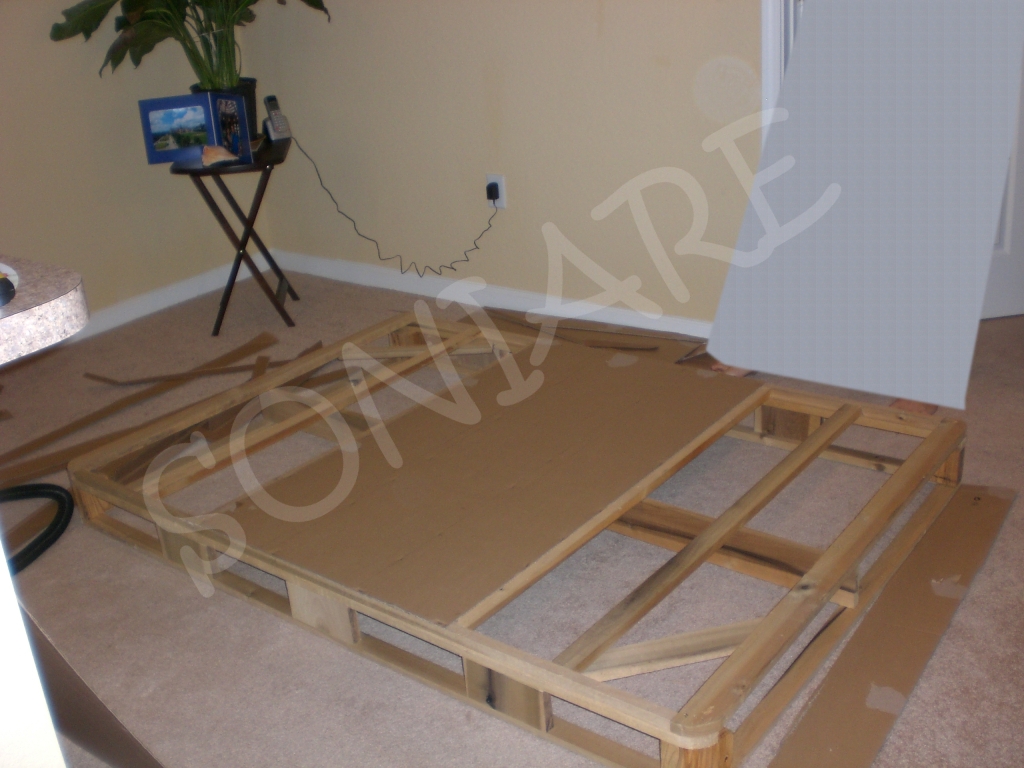
Here is the cardboard layer stapled to the frame:
Voici la couche de carton agrafée au cadre:

Now let's work on the foam layer. First we need to cut it:
Passons maintenant à la couche de mousse. Il faut d'abord la découper:

Then we can attach it to the wood frame using staples:
Ensuite on l’agrafe au cadre en bois:

We made the corner thicker because it is always at the corner that you hit your legs...
Nous avons rembourré les angles pour éviter de se faire mal quand on se cogne contre le sommier...

Finally, here is the foam layer done:
Voici la couche de mousse terminée:

Now let's work on the outter layer: We chose this fabric because it was on sale:
Passons maintenant à la couche extérieure. Nous avons choisis ce tissus car il était en solde:

As before, we have to cut it and staple it to the frame:
Comme pour la mousse, il faut découper le tissus et l'agrafer au cadre:

Finally, here is the box spring at the end:
Enfin, voici le résultat:


Better than new !
Mieux que du neuf !

Soniare and Takskal


DIY tutorial: Refreshing and painting an old desk / Fait maison tutoriel: transformer et repeindre un vieux bureau

We found this desk at the goodwill foundation. It was really nice, but in bad condition...
Nous avons acheté ce bureau à l’équivalent Américain d’Emmaüs. Il était sympa, mais pas en très bon état...


As usual, the first step is sanding... The desk:
Pour commencer, il faut poncer... D'abord le bureau:

And the drawers:
Puis les tiroirs:


Since we wanted to put it in the same room as the drawer cabinet, we decided to use the same colors and pattern.
First layer, blue:
Nous avons acheté ce bureau pour le mettre dans la même pièce que notre commode donc nous avons choisis les mêmes couleurs et les mêmes motifs.
Première couche, bleu:


Then, we add some tape to draw a frame:
Ensuite, nous avons dessiné un cadre avec du scotch:


And we paint the next layer in white. When you remove the tape, it looks really nice!
Puis nous avons peint la couche suivante en blanc. Voici le résultat quand on enlève le scotch:


Now we have to do the drawers. We didn't like the pattern on it, and we wanted them to look like the one on the drawer cabinet, so we made them look like it. Here they are before:
Passons maintenant aux tiroirs. Nous n'aimions pas trop le motif qu'il y avait dessus, mais surtout on voulait les assortir à notre commode, donc nous les avons modifier. Les voici avant:


We used some wood paste to fill in the pattern:
Nous avons utilisé de la pâte à bois pour dissimuler le motif:


Here they are before sanding:
Les voici avant le ponçage:


During sanding:
Pendant:


And after sanding. It has to be really smooth if you don't want to see it under the paint:
Et après. Il faut que la pâte soit très lisse sinon elle se verra sous la peinture:


Now we can start to paint. Here is the first layer, yellow:
Maintenant nous pouvons commencer à peindre. Voici la première couche, jaune:


Then we draw the curved line with some thin tape, and we paint the next layer, blue:
Ensuite, nous avons dessiné des motifs avec du scotch fin, puis nous avons peint la couche suivante, bleu:


And finally, when you remove the tape, it looks like this:
Voici le résultat quand on enlève le scotch:


Now we have to drill some holes for the handles. First put some tape to avoid to scratch the paint:
Maintenant il faut percer des trous pour les poignées. Nous avons utiliser du scotch pour protéger la peinture:


Drill the hole through the tape, and then remove it. You will have a nice hole without any scratches:
Percer le trou à travers le scotch, puis l'enlever. Vous aurez un joli trou sans écailles:


Finally, put the drawers back and TADAAA!
Enfin, remettre les tiroirs en place et voilà!!!


Better than new !
Mieux que du neuf !

Soniare and Takskal

DIY tutorial: Refreshing an old couch / loveseat / Fait maison tutoriel: retaper un canapé

We found this corduroy couch in the trash. It was in a good shape, but it was really dirty and way too soft... The springs were dead!

So the first thing to do is to take all the fabric away, and this implies a lot of staples !!! Be careful, take some pictures and take some notes to remember how to re-assemble everything!

The first thing to remove is the bottom fabric (below the couch), and then keep going... We used a flat screwdriver and some pliers to take all the staples away.

Keep going...

We used some bags to store the foam. Many bags!!!

Finally we can see the frame!

So we washed all the fabrics in the washing machine, while we were taking care of the springs.
We had some spare slats from IKEA, so we decided to use them to make the couch firmer.

The good thing about these slats is that they are attached to each other with a strap, so all we had to do was to place them and use some staples to keep them in place.

Now the fabric is clean! let's re-assemble!

This is how they do to hide the transition between two fabric pieces!

And here another trick for the back!


And the same trick for the sides.


Finally the bottom!

And here is our like new couch! TADAAA!


Better than new !

Soniare and Takskal